
“Time isn’t precious at all, because it is an illusion. What
you perceive as precious is not time but the one point that is out of time: the
Now. That is precious indeed. The
more you are focused on time—past and future—the more you miss the Now, the
most precious thing there is.” –Eckhart Tolle
Albert Einstein also once said time is an illusion. That’s
not something that I’ve ever really stopped to think about (like REALLY think
about) but it has become such a powerful statement to me over the past year. Dealing
with pain, fatigue, and sometimes just straight laziness, I often feel like
time is flying away. I’m not getting as much done as I want. I keep thinking of
what I need/want to do over the next few months – that’s where the dread sets
in. I’m not one to panic or stress (I’m really not) but when I have deadlines
to meet and people who are counting on me, I just don’t feel like I have enough
time. Something I said in one of my previous enchanted blogs was, “We need to
find tranquility in the cracks of our spinning clocks.” That inspired quote has
always stood out to me. It’s so important to find ways to use time to our
advantage – to take this universal gift from the cosmos and let it carry us
gracefully through life as a tool versus a burden.
We watch ourselves, our children, and our loved ones getting
older as our “biological clocks” keep ticking, but when I realize I only cross
a date off my calendar because the earth has done one full rotation, I feel a
sense of relief. I know we learn this as young children but as we get older we
worship the clock as if it’s ticking just for us. Clock time is a tool used to
create order in our lives but beyond that, it, in and of itself, shouldn’t be
ruling over us.
It’s obvious this costuming is steampunk inspired. Steampunk
is a fashion movement but is exponentially more meaningfully. It is a bridge
between the past and the future so everything can be connected to this present moment.
It’s a way of expressing an infinite amount of time periods through costuming
and lifestyle. Because this movement involves travel and time – clocks, gears,
and compasses are a staple part of design. Even temperature gauges can be used
because steam can help push forward. It’s a means of transportation.
I knew I wanted steampunk wings to best express the story and
concept, but struggled with how it all represented a story? How could my character
conceptually control time? I finally saw a way: she would melt clocks down to molten
metal and pour that into a handmade “cast iron” mold for wings. She would
become an artisan of flight made from time. If time flies, why can’t we fly along
with it?
I had been back and forth with titles not really happy with anything. Yes she's steampunk, shes time, shes a creator of freedom and shes infinite, but that wasn't satisfying me. I asked my brother what his thoughts were and within the next half hour we began to research and quickly he mentioned Aeon which is the greek word for eon: an indefinitely long period of time. But originally: a power existing from eternity; an emanation or phase of the supreme deity. That was it. I just felt it. We even high-fived! So without further ado...
Introducing...
The Enchanted Aeon


Behind the Scenes - The Creation
The Wings
As you can see, these wings were not an easy task to
accomplish. I had an idea of what I wanted to do and how I wanted to do it, but
it was going to take a lot of help. I started thinking that I could just find a
few gear designs I liked online and “easily” Xacto blade through the paper
printout and then through some cardboard but, ummmm….no. Wasn’t happening. I’m
crazy. Then I thought…well maybe I can ask my awesome neighbor who has a die-cut
machine to at least cut them into stencils THEN I can trace and cut them from
poster board, but ummmm…no. Wasn’t happening. To my rescue came The Worthen’s
from Hobbyholica. Billy is talented with all kinds of saws, and this was going
to take his scroll saw. I tried myself and ummm, no. Without his help, these
wings would have been super sloppy and I’m forever grateful!
The frame of the wings were just PVC pipe! I cut and
connected them into the shape I wanted and then hot glued each piece together. I
left the two separate as to make transportation easier. I found a few other gadgets
like large cardboard keys, ship wheels and dial clocks to fill in some of the
blanks. Then I found a three piece steampunk clock at the store!! It was a
perfect large addition to each wing. I carefully hot-glued all those things
together in the placement I thought looked good. I originally didn’t draw these
out with feathers, but when the gears were all there, it just worked. I used
leftover feathers from “The Enchanted Guardian” shoot and a boa from the store
as the fluffy filler. I cut curved pieces of poster board and glued them to
each PVC pipe end to create the bottom shape and a place for the feathers to
stick in to.
Once completed, I took them outside and sprayed with
textured bronze, metallic gold and sparkle paint. When I went back outside to
get them after they finished drying, I picked them up and the summer heat
softened the hot glue and pieces started melting off!! I took them back inside
in quite the panic but glued them back together with ease. I continued to have
problems with several pieces, but it was nothing some electrical tape on the
day of the shoot couldn’t fix!
I was in such pain from sitting on the ground so much and
you can see my sweet 8 year old Jordan helped massage some life back into my
shoulders!


 |
| I burnt my finger pretty badly on the hot knife so I had my finger in ice milk. Kitty was obsessed. |


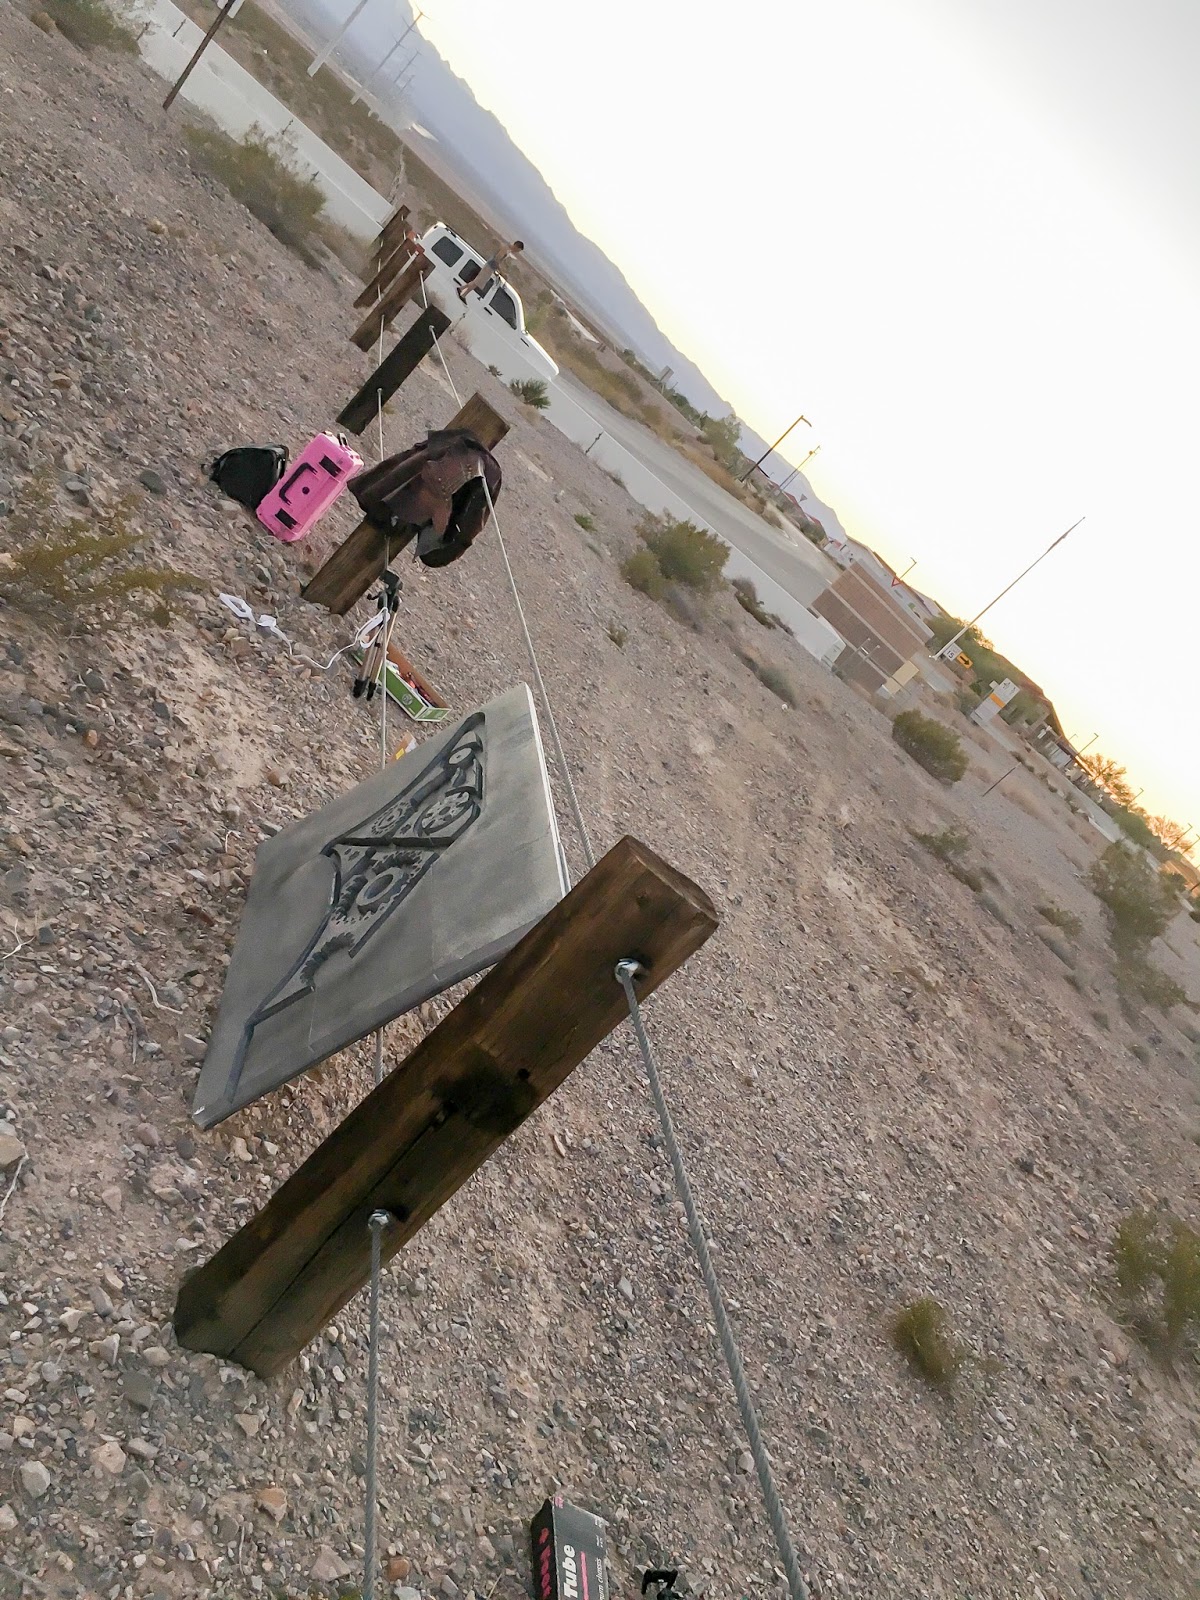
The "Cast Iron" Mold
Next was the “cast iron” mold for the molten metal. I was
totally at a loss for how this was going to get done, but my talented friend
Jordan Dube who was the Shadow Ridge High School Theater student stage and
lighting manager and set designer (yes big title but it’s all true), suggested
that I just get thick sheets of Styrofoam from a craft store and hot knife my
design into it! Genius! It was not easy and I made a MESS but it worked!! Once
it was done, I used several silver spray paints and textures to get the look I
wanted. I knew how I was going to create the look of the molten metal pouring
out (which I explain below), but I decided that maybe…just maybe I could use fluorescent
acrylic paint on the inside edges to achieve the glow and it worked better than
I could have imagined.


The "Molten Metal" Bucket
Then it was onto my bucket. It was not exactly what I
pictured, but it worked. I took a silver metal bucket, painted it flat red,
then I used spray glue around the edges and sprinkled rocks and dust around,
then painted black over that to show wear and tear. It was an interesting
process and one of those things that I was ok with it serving its small
purpose.
The most incredible part of the bucket was how to fabricate the molten metal! Steve, my mom's hubby came up with the idea of finding florescent beads online and using a slow shutter speed and a black light to capture them falling in motion! We only messed with it for a few minutes before getting the perfect shot at their house. I am so grateful for his idea!


 |
| Test shot |
The Full Look Finished!
The corset was found online on Yandy.com. The skirt was a
hand-me-down from an old bridesmaid dress of a friend and the pocket watch
necklace was a stunning antique belonging to my mom’s husband Steve’s
grandfather who collected them. The other pocket watch she is holding in the
second image also belongs to him. The other large clocks in the bucket were
found at thrift stores and other random places and were surrounded in a couple
dozen battery powered tea lights to create the beautiful glow. The hairpiece
was different steampunk trinkets found at a craft store glued together and onto
a clip.


The Hair Piece


My room when all is said and done...
 |
| My room was out of control! |
My Model
Here comes the part where I tell you about my beautiful
model, Lisa! She is my cousin but we have never met until this year. I believe
that my grandma is her mom’s aunt. I met her mom at one of my 1st
cousins wedding several years ago. She said…”You live in Vegas? My daughter
does too! You should connect!” Well…we connected on Facebook and figured out
that we literally live off the same street but 3 miles apart – IN ALL OF VEGAS!
Still, 2 busy moms never actually got together. Flash forward to a couple
months ago when I was really starting to orchestrate this shoot. I was yet to
be inspired with my model until Lisa posted a photo or something on Facebook. My
shoot flashed through my mind – I kind of brushed it off. Then again it
happened! Anytime she would post something or comment on something of mine, I
would visualize this creation. It was at that point I knew she was the one. I
called her up and asked her if she would be willing. Not surprising at all, she
told me she in love with the steampunk movement and costuming. She had even
planned on dressing up like that for Halloween! In the stars, right!? So the
story doesn’t end there! Only a few days after talking to her on the phone and
beginning to collaborate, I was at target with my brother. I noticed the shirt
a women was wearing from a brand I love called Electro Threads. I pointed to
the shirt without looking at her face and said to my brother “I love this
brand! It’s what Andrew bought me for Mother’s Day!” I then hear the women’s
voice say “Kira?” I looked up and there she was! After 6 years living that
close and never meeting or bumping into each other, we happen to connect so serendipitously
less than a week after taking on the phone. How bonkers is THAT!? Anyway, we
clicked immediately!
The Day Of
The Hair & Makeup
I’m never good at planning timing! No pun
intended. I told Brittany (one of my BFF’s and incredible makeup artist) that I
wanted to start makeup around 5:30. I was thinking that I needed to be shooting
by 7:30 but I was all wrong. At least that was wrong according to what I
originally had planned for lighting. They were finishing up the stunning makeup
which was primarily bronze and gold, but still needed to glue the gears and
glitter to her face. I asked if we could just run out the door and finish up in
the van at the shooting location. We did that but I forgot the glue! Brittany
ended up using hairspray and chapstick!! Hahahaha!!! It was not working like we
needed but it was working for long enough to capture the pictures. She looked so gorgeous and as always Brittany brought
this vision to life!


 |
| Close up of makeup details |
Shooting Adventures
So many elements needed to be taken care of and we weren’t actually
set up until 8:30 or so which by that time was DARK. I was stressing but
continuing to tell myself that it always works out. A while back I found out
that an old friend of mine Rick Onsgard from Junior High lived here in Vegas
and is a champion with videography and editing. We connected and decided it
would be fun to get some footage of this shoot. He was so great and generous to
help out, not only with video and behind the scenes footage, but with lighting
and props and anything extra that I needed.
As the night got darker…the moon started to rise and light
the northern mountains behind us. Andrew hooked up the black light to the car
engine with a power converter and we fired that up. It was time to photograph
the “molten metal”. When I set my camera shutter speed to F/5 which means it
opens up and lets light in for 5 second, I was completely focusing on getting
the motion of the beads, but with that the whole sky lit up. Stars covered the
image and I fell in love. It wasn’t what I planned for, but the infinite universe
needed to show its freckles. We had a few visitors from the shooting range down the street come by and ask what we were doing but everything happened pretty smoothly. My off camera lights worked how I needed them for the most part and Lisa held those heavy wings up like a champ.


I had so many hands helping to pull this off. Huge thanks to the team of Andrew my hubby, Brittany my makeup girl and friend, my cousin Lisa, my Brother who assisted during the whole thing, my friend Rick who captured behind the scenes footage (which I will post soon) and assisted in many ways and Billy from Hobbyholica for meticulously cutting those gorgeous gears for me! Thanks everyone!
Camera & Settings:
Canon 5d MarkIII
Yungnuo Flashes & Triggers
Lume Cube light
Sigma 24-105 4.0 lens
1st image: F/5, 1/4 shutter, 2000 ISO (high side manual pop flash)
2nd image: F/4, 1/6 shutter, 1250 ISO (front manual pop flash, back camera triggered flash)
3rd image: F/4, 1/5 shutter, 1250 ISO (front manual pop flash, back camera triggered flash and black light)
I don't know why, maybe I'm just having an emotional day, but this one has me bawling my eyes out! Your description of time in the beginning of the blog, and all the quotes (especially yours) made me feel so connected to this vast universe. And for you to have created this magnificent expression of the illusion of time, just has me very emotional! GREAT job Kira, and all those who helped bring this vision together.
ReplyDeleteYou never cease to AMAZE me. Your so talented and gifted I can't explain just how amazing all your shoots have been! I love the stories and behind the scenes so everyone can see all the work and detail you put in. Love you! Can't wait for your next one!
ReplyDelete"She would become an artisan of flight made from time. If time flies, why can’t we fly along with it?" Damn, that's brilliant!! This whole project is brilliant! The way you treated that bucket, the way you make PVC pipe and poster board look light and air-obtainable, the way your turn a vacant lot into a living dream--it's ALL brilliant! You have the right to call yourself Artist and even Master!!
ReplyDeleteBTW: Where did you put the UV LEDs? Down inside the bucket?
Oh..duh...one merely needs to finish reading the Blog to find out how UV light was applied :P
Delete